There's this inconvenient phenomenon that occurs in my laundry. Tissues get left in pockets. So they end up exploding in my washer and then in my dryer. Today after it happened I had this strange urge to vacuum out the lint catcher in my dryer. I want to say something funny and witty, but I think it's really more important that you take me seriously about this for a few minutes! Here's my Pinterest, to give my Tip credibility! Visit Tamara M. Hannah's profile on Pinterest.
First I removed the lint catcher and started to run hot water on it. The water was beading off, rather than draining through the mesh. I said to myself, "I think this was a good idea!" and grabbed the soap and a scrub brush. Next, I took the Dyson with the crevice tool and started to clean out the area that holds the lint catcher.....
THIS IS WHAT WAS IN THERE! I had to empty the Dyson vacuum 3 times!
 Needless to say, I did some investigating, just to find out how all of this works. This "grate" comes off of the inside of the dryer wall just below where the lint catcher rests. Once I took it off a PILE of lint and about half a cup of sand fell out of the crevice that it covered! I was shocked and grossed out. This is how houses burn down.
  Next, I scrubbed the build up from the grate, this is how my lint catcher looked also. I vacuumed the rest of the gap where the lint was building up. I could fit my whole hand down there and was gathering hand fulls of lint. Ok, so this dryer was a second hand jobbie that was in my loft when I moved in. It didn't occur to me that cleaning it was a necessity. I'm sharing this well learned lesson with you today for the simple fact that I think it's pretty unsafe.
  Here is my washed out lint trap!
 Here is a weird angle of the whole area that the grate piece screws on to and then where the lint catcher would sit. This photo is after I cleaned it all out.
 Here's the clean grate being screwed back onto the inside of the dryer.
 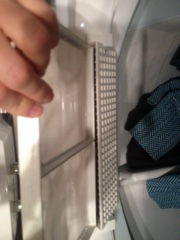 And inserting my clean lint catcher back into its holder.
This situation made me nervous because sometimes I like to leave the dryer running when I leave the loft for work in the afternoon. Riggs isn't very good at calling 911 if you know what I mean.
So take a few minutes when you load the dryer next time and see if you have any build up in your lint catcher! This whole project only took me about half an hour, it was worth it!
This certainly isn't my most sparkly, bubbly, glittery post to date. And you'll adjust. It can't all be rainbows and kittens!
Hey, I know how to make you feel better!
You'll get linked up to my Pottery Verve 2015 Survey, and if you take 3 minutes to fill out my easy peasy survey...

You could win a Jack O' Lantern mug made by me!
Thanks for following Pottery Verve xo
Here's what happens! https://www.facebook.com/909263429090411/photos/a.927517143931706.1073741830.909263429090411/1216814768335274/?type=3


